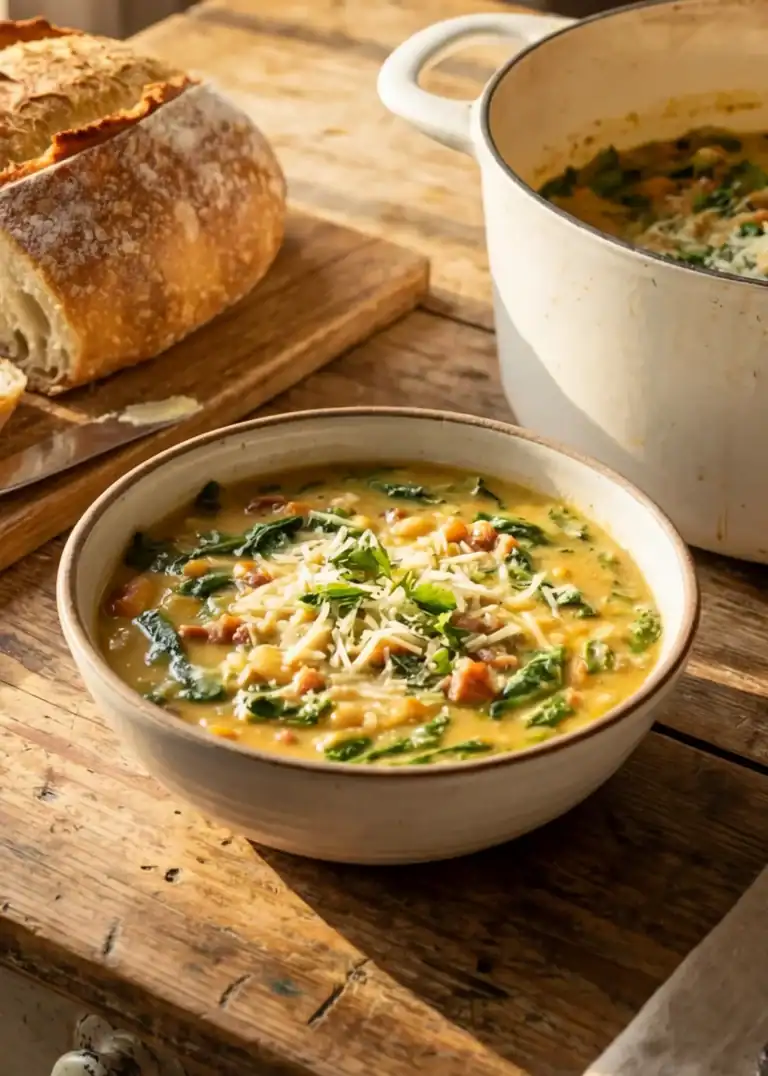
5 Easy Easter Side Dishes
Five simple, delicious side dishes to round out your Easter dinner — all in one place. We’re making pimento cheese deviled eggs with a Southern twist, honey roasted carrots with a buttery garlic glaze, bacon-wrapped green bean bundles, creamy scalloped potatoes straight out of a Betty Crocker cookbook (with a few upgrades), and the easiest three-ingredient dinner rolls you’ll ever make. Several of these can be prepped the day before, so you’re not stuck in the kitchen all day on Easter. Whether you’re feeding a big crowd or just want a beautiful holiday table, these sides bring the flavor, the color, and all the comfort your family is looking for.
A Holiday Table Worth Gathering Around
This is the kind of meal I get the most excited about putting together. Not because any single dish is complicated — honestly, every one of these is simple — but because when you set them all out on the table together, it just looks like a holiday. You’ve got the color from those roasted carrots, the elegance of those green bean bundles wrapped in bacon, the comfort of a big bubbly dish of scalloped potatoes, and of course, no Southern table is complete without a plate of deviled eggs.
I wanted to do something a little different this time and show you how to spread the work across two days. The day before Easter, we’re going to knock out the deviled eggs, prep the carrots, and blanch the green beans. All of that can sit in the fridge overnight and be perfectly fine. Then on Easter day, we tackle the scalloped potatoes, finish up the green bean bundles and carrots, and whip up some rolls that take about ten minutes to put together. It makes the whole process feel so much more manageable.
And I have to tell you — when Darren snuck in and grabbed a couple of those deviled eggs before we even got to the official taste test, I knew we had a winner. He gave them a thumbs up from behind the camera, though he did say he might prefer the sweet relish. So try it both ways and see which one your family likes best.
Every single one of these dishes would be perfect alongside your Easter ham, but honestly, you could serve them any time you want a special meal. Let me walk you through all five.
Recipe 1: Pimento Cheese Deviled Eggs
We love a classic deviled egg here in the South, but today we’re combining two things that Southerners truly love — deviled eggs and pimento cheese — and putting them together. You’ll have your egg whites, then a layer of pimento cheese down at the bottom, and then that good creamy egg yolk filling on top. Finished off with a little smoked paprika and a slice of kosher dill, these are just a little bit elevated for your Easter table. And the best part? You can make them the day before.

I will say, I typically use sweet relish in my everyday deviled eggs, but for this version I went with dill relish instead, and I’m really glad I did. That tang works so well with the pimento cheese. But try it either way — you may decide you like one better than the other, and that’s perfectly fine.
One tip I’ve learned over the years: if you know you’re going to make deviled eggs, buy your eggs a week or two ahead and let them hang out in your fridge. The older eggs just peel so much easier, and it’ll save you a lot of frustration.
Prep Time: 30 minutes | Cook Time: 11 minutes (boiling) | Chill Time: 15 minutes | Makes: 22–24 deviled egg halves
Ingredients
- 11–12 large eggs
- 8 oz pimento cheese (store-bought or homemade), left out to soften
- Just under ½ cup mayonnaise
- 2 teaspoons yellow mustard
- 4 tablespoons dill relish (or sweet relish, if you prefer)
- 1½ teaspoons dried minced onion
- ½ teaspoon salt
- Smoked paprika, for topping
- Kosher dill pickle slices, quartered, for topping
Instructions
- Place your eggs in a pot and cover them with water. Add a sprinkle of salt to the water — this helps the shells release more easily when it’s time to peel. Turn the heat to high and bring the water to a full rolling boil.
- Once the water reaches a full boil, turn the heat off completely. Leave the pot right where it is on the burner with the lid on. Set a timer for 11 minutes. Anywhere from 10 to 12 minutes will give you perfectly boiled eggs.
- While the eggs finish cooking, prepare an ice water bath in a large bowl with plenty of ice and cold water. When the timer goes off, transfer the eggs to the ice bath and let them chill for about 15 minutes. This stops the cooking process and makes them easier to peel.
- Peel the eggs by tapping the larger end on the counter, then rolling gently to crack the shell all around. Peel under a little bit of cold running water to help the shell come away cleanly.
- Slice each egg in half lengthwise and carefully remove the yolks into a separate bowl. Arrange the egg white halves on your serving plate.
- Mash the egg yolks with a fork until they’re fairly smooth — a few small lumps are fine, but you don’t want big chunks. Add the mayonnaise, mustard, dill relish, dried minced onion, and salt. Stir everything together until it’s creamy and well combined. Give it a taste and adjust the salt or relish if needed.
- Spoon or pipe a small amount of pimento cheese into the bottom of each egg white half. You want enough to get that flavor in every bite, but leave room for the yolk filling on top. An 8 oz container should be just about right — you may not need quite all of it.
- Pipe or spoon the egg yolk filling on top of the pimento cheese, covering it completely.
- Sprinkle smoked paprika over the top of each egg. Cut kosher dill slices into quarters and place one small piece on top of each egg for a pretty finish.
- If making ahead, cover the plate and refrigerate. Pull them out about 30 minutes before serving — you want that pimento cheese to be a little bit soft when people bite into it, not ice cold and hard.
FAQ
Can I make these the day before Easter? Absolutely. These are perfect for making a day ahead. Just cover the plate tightly and store them in the fridge. Pull them out about 30 minutes before you’re ready to serve so the pimento cheese softens up a bit.
Can I use sweet relish instead of dill relish? Yes, you can. I typically use sweet relish in my everyday deviled eggs. For this version, I preferred the dill because it paired really well with the pimento cheese, but Darren actually thought he liked the sweet relish better. Try it either way and see what your family prefers.
What if my eggs are hard to peel? Fresh eggs tend to be harder to peel than older ones. If you know ahead of time that you’re making deviled eggs, buy your eggs a week or two early and let them sit in the fridge. Adding salt to the boiling water and using an ice bath after cooking both help too.
Why do you turn the heat off instead of boiling the eggs the whole time? This method gives you perfectly cooked yolks that are bright yellow, not gray or overcooked. Bringing the water to a boil and then letting the eggs sit in that hot water for 11 minutes is a gentler way to cook them and gives you a much prettier result.
Do I have to use piping bags? Not at all. A spoon works just fine. The piping bags just give you a slightly cleaner and prettier look. If you do use a bag, a plain piping bag or even a zip-top bag with the corner snipped off will work perfectly.
Can I use a different type of mustard? Sure. Yellow mustard is what we used, but Dijon or stone-ground mustard would both work well if you prefer a slightly different flavor.
How far ahead can I soften the pimento cheese? Set it out when you start boiling your eggs. By the time you’ve boiled, chilled, peeled, and made the filling, the pimento cheese will have been sitting at room temperature long enough to be soft and easy to work with.
Recipe 2: Honey Roasted Carrots with Garlic Glaze
These honey roasted carrots are one of those sides that look beautiful on the plate and taste even better than they look. You get that gorgeous caramelization from roasting, a little sweetness from the honey, and just a hint of garlic in the glaze. A squeeze of lemon juice right at the end brightens everything up.
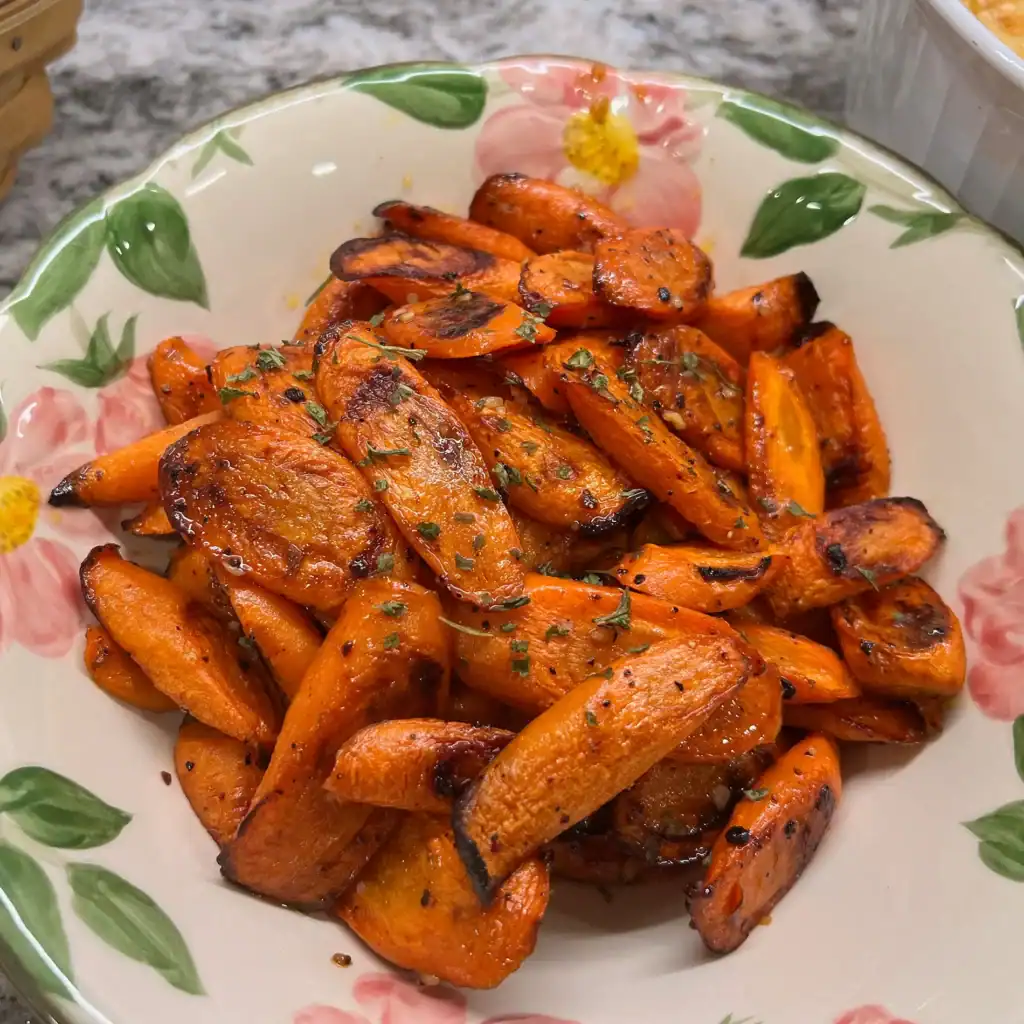
The nice thing about this dish is that you can do all the peeling and chopping the day before. Just seal the prepped carrots in a bag in the fridge, and they’ll be perfectly fine until you’re ready to roast them on Easter day. That little bit of prep work ahead of time makes a big difference when you’ve got multiple dishes going at once.
I like to cut my carrots on a diagonal — mainly because I think it just looks prettier when you serve them. But cut them however you like. The important thing is getting them in a single layer on your sheet pan so they roast evenly and get that beautiful char on the edges.
Prep Time: 15 minutes (can be done the day before) | Cook Time: 30–35 minutes | Servings: 6–8
Ingredients
For the carrots:
- 2 pounds fresh carrots, peeled and cut on a diagonal
- 1 teaspoon salt
- Just under ½ teaspoon black pepper
For the honey garlic glaze (divided in half):
- 3 tablespoons butter
- About 2 cloves garlic (minced or squeezed)
- 1½ tablespoons honey
- 1 tablespoon lemon juice (or the juice of half a fresh lemon)
Instructions
- Day before (optional): Peel, wash, and chop the carrots. Store them in an airtight bag or container in the refrigerator until you’re ready to cook.
- When you’re ready to roast, preheat your oven to 425°F.
- Make the honey garlic glaze by melting the butter in a small pan. Add the garlic and cook for just about 30 seconds — long enough to get that aroma going but not long enough to burn it. Remove from heat and stir in the honey.
- Pour about half of the glaze over the carrots in the bag or a large bowl. Add the salt and pepper. Toss or shake until the carrots are evenly coated. Reserve the other half of the glaze for later.
- Spread the carrots in a single layer on a sheet pan. You want them to have some space so they roast rather than steam.
- Roast for about 20 minutes, then pull the pan out, stir and flip the carrots, and put them back in the oven for another 10 to 15 minutes. You’re looking for good caramelization and browning on the edges. Test one of the bigger pieces with a fork to make sure they’re tender all the way through.
- When the carrots come out of the oven, drizzle the reserved honey garlic glaze over the top. Add the lemon juice and give everything a gentle toss. Serve warm.
FAQ
Can I prep the carrots the day before? Yes, and I’d recommend it. Peel, wash, and chop them, then seal them in an airtight bag in the fridge. They’ll be perfectly fine overnight and ready to roast the next day.
What if I don’t like garlic with carrots? You can leave the garlic out of the glaze entirely. The honey and butter alone will still give you delicious roasted carrots with plenty of flavor.
Can I use baby carrots instead of whole carrots? You can, but whole carrots that you cut yourself tend to roast better and get more caramelization. Baby carrots have a higher moisture content and won’t brown as well on the edges.
Why do you add the glaze in two stages? The first half of the glaze goes on before roasting to help with caramelization. The second half goes on right after the oven, along with the lemon juice, so you get a fresh burst of that honey garlic flavor that hasn’t been cooked away.
How do I know when the carrots are done? Look for good browning on the edges and test one of the larger pieces with a fork. It should go in easily. Total roasting time is usually 30 to 35 minutes, but every oven is a little different.
Can I use fresh lemon instead of bottled lemon juice? Absolutely. Squeeze about half a fresh lemon over the carrots after they come out of the oven. Fresh will give you an even brighter flavor.
Recipe 3: Bacon-Wrapped Green Bean Bundles
These green bean bundles are one of those dishes that look fancy on the plate but are honestly not that hard to put together — especially if you do the prep work the day before. We blanch the green beans ahead of time, let them sit overnight in the fridge, and then all you have to do on Easter day is wrap them in bacon and bake them. The sweet and savory glaze with butter, brown sugar, and a little soy sauce goes on top right before serving, and it really takes them to another level.
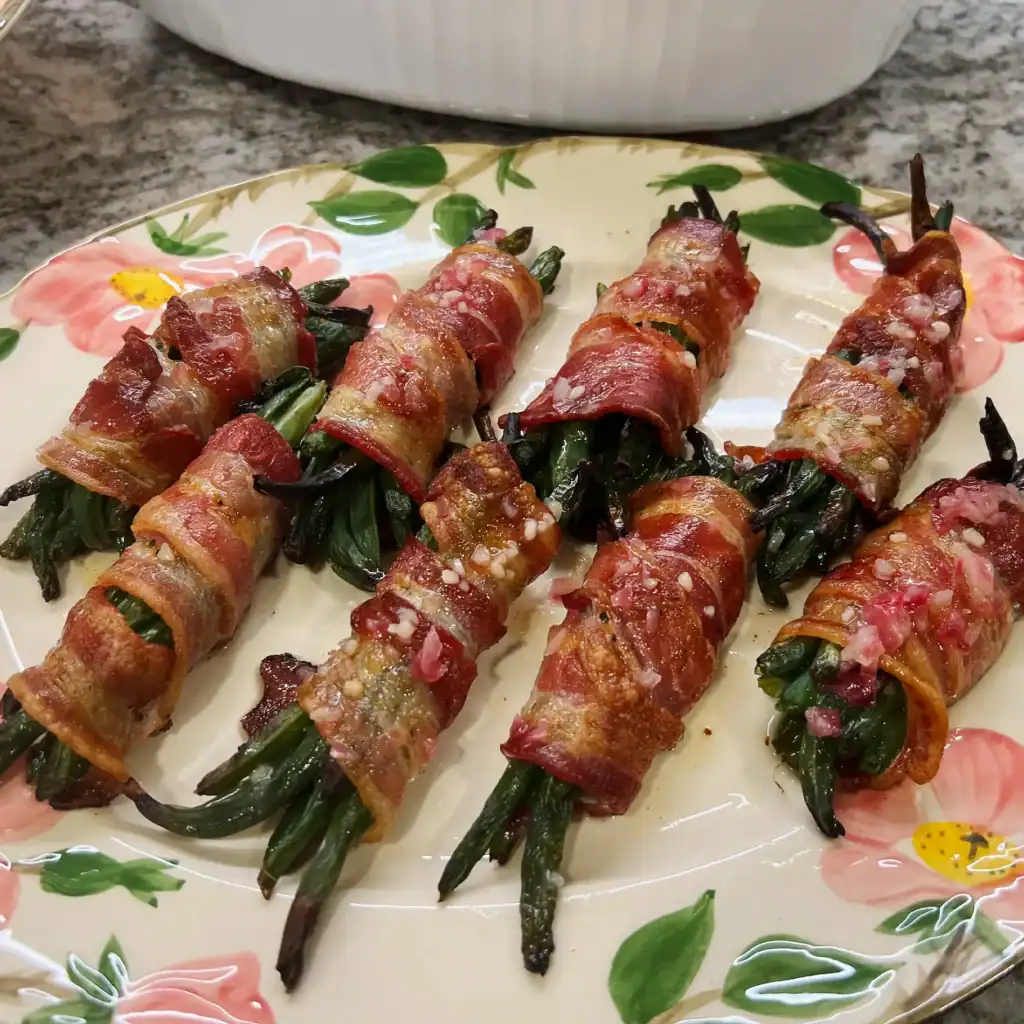
I blanch the green beans with some salt in the water so they start picking up flavor right from the start. Three minutes is all they need — just enough to take the raw edge off without making them soft. Then into an ice bath and straight to the fridge. Easy as that.
For the bacon, I’d recommend using regular sliced bacon for these bundles rather than the thick-cut variety. Thick bacon is wonderful for eating on its own, but for wrapping around green beans, you want it thin enough that it gets nice and crispy during the baking time.
Prep Time: 15 minutes (blanching, day before) + 15 minutes (assembly, day of) | Cook Time: 20–25 minutes | Makes: About 8 bundles
Ingredients
For the bundles:
- 1 pound fresh green beans, washed and trimmed
- 8 slices regular (not thick-cut) bacon
- Salt for blanching water
For the glaze:
- 3 tablespoons butter
- 1 tablespoon red onion, minced very fine
- 1–2 cloves garlic (minced or squeezed)
- ½ teaspoon salt
- 1 tablespoon sugar
- 1 tablespoon rice vinegar
Instructions
- Day before: Bring a large pot of water to a boil and add about 1½ teaspoons of salt. Add the green beans and blanch for exactly 3 minutes.
- Drain the hot water and immediately run cold water over the green beans several times until they are cool to the touch. This stops the cooking and keeps them bright green.
- Place the cooled green beans in an airtight bag, press out the extra air, and store in the refrigerator overnight.
- Day of: Preheat your oven to 375°F. Divide the green beans into about 8 even bundles.
- Take one slice of regular bacon per bundle. Starting at one end, wrap the bacon around the bundle, working your way down so the green beans peek out just a little on each end.
- Place the bundles on a baking sheet and bake at 375°F for 20 to 25 minutes, until the bacon is crispy on the top and edges.
- While the bundles bake, make the glaze. Melt the butter in a small pan, then add the minced red onion and garlic. Cook for just a couple of minutes. Remove from heat and stir in the salt, sugar, and rice vinegar. Stir until the sugar is fully dissolved.
- When the green bean bundles come out of the oven, drizzle the glaze over each bundle and serve right away.
FAQ
Can I blanch the green beans the day before? Yes, that’s exactly what I recommend. Blanch them for 3 minutes, cool them down in cold water, and store them in a sealed bag in the fridge overnight. They’ll be perfectly fine and ready to wrap the next day.
Why do you add salt to the blanching water? The salt helps the green beans start picking up flavor right away while they blanch. It makes a noticeable difference in the final dish.
Can I use thick-cut bacon? I’d stick with regular sliced bacon for this one. Thick-cut bacon is delicious, but it won’t get crispy enough in the time it takes the green beans to cook. Regular bacon crisps up perfectly in 20 to 25 minutes.
What does the rice vinegar do in the glaze? It adds a little sweet and sour tang that balances out the butter and sugar. It’s subtle, but it really lifts the whole dish. If you don’t have rice vinegar, white wine vinegar would work in a pinch.
How many green beans go in each bundle? There’s no exact count — just divide them as evenly as you can. I aim for about 8 bundles from a pound of green beans. Each bundle should be big enough that the bacon can wrap around it with a little overlap.
Can I make the glaze ahead of time? You can make it a few hours ahead and just gently rewarm it before drizzling. You want it warm enough that the butter is melted and pourable.
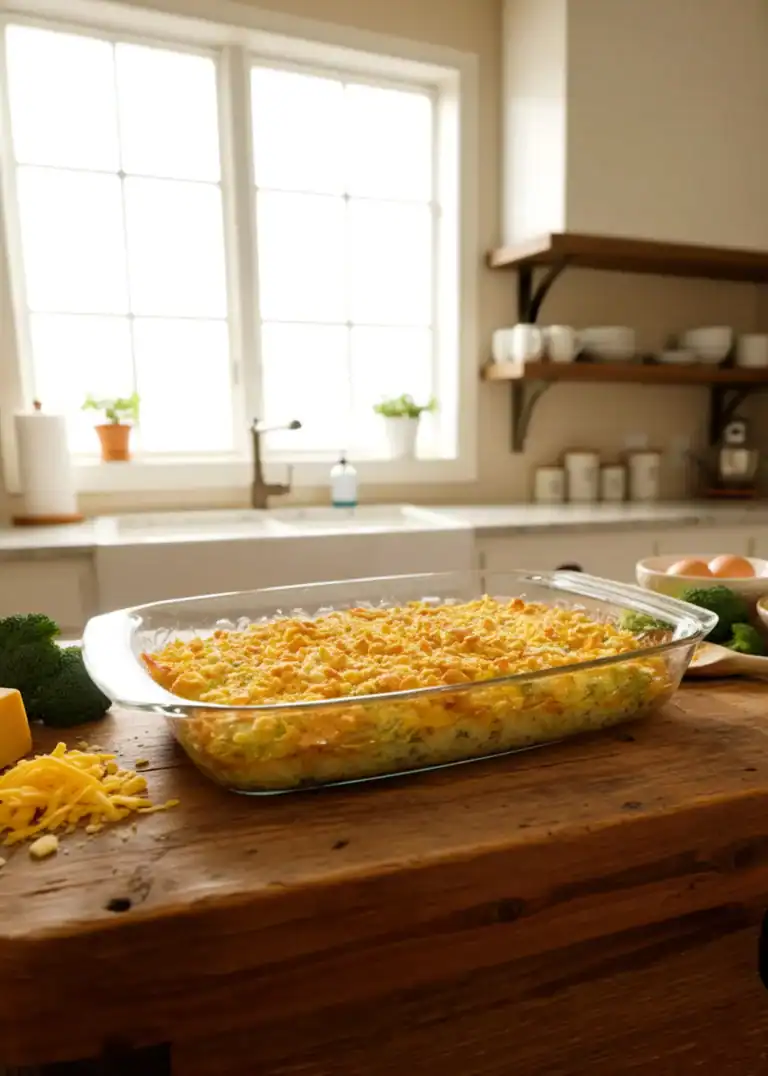
Recipe 4: Scalloped Potatoes
Don’t let the name scare you if you’ve never made scalloped potatoes before. It sounds fancier than it is — it’s really just a good old potato casserole. I have my Betty Crocker cookbook that somebody gave us as a wedding gift, and let me tell you, for someone jumping into the kitchen and suddenly responsible for all three meals a day, that cookbook was such a great addition. It had some wonderful basic recipes, and this is one of those.
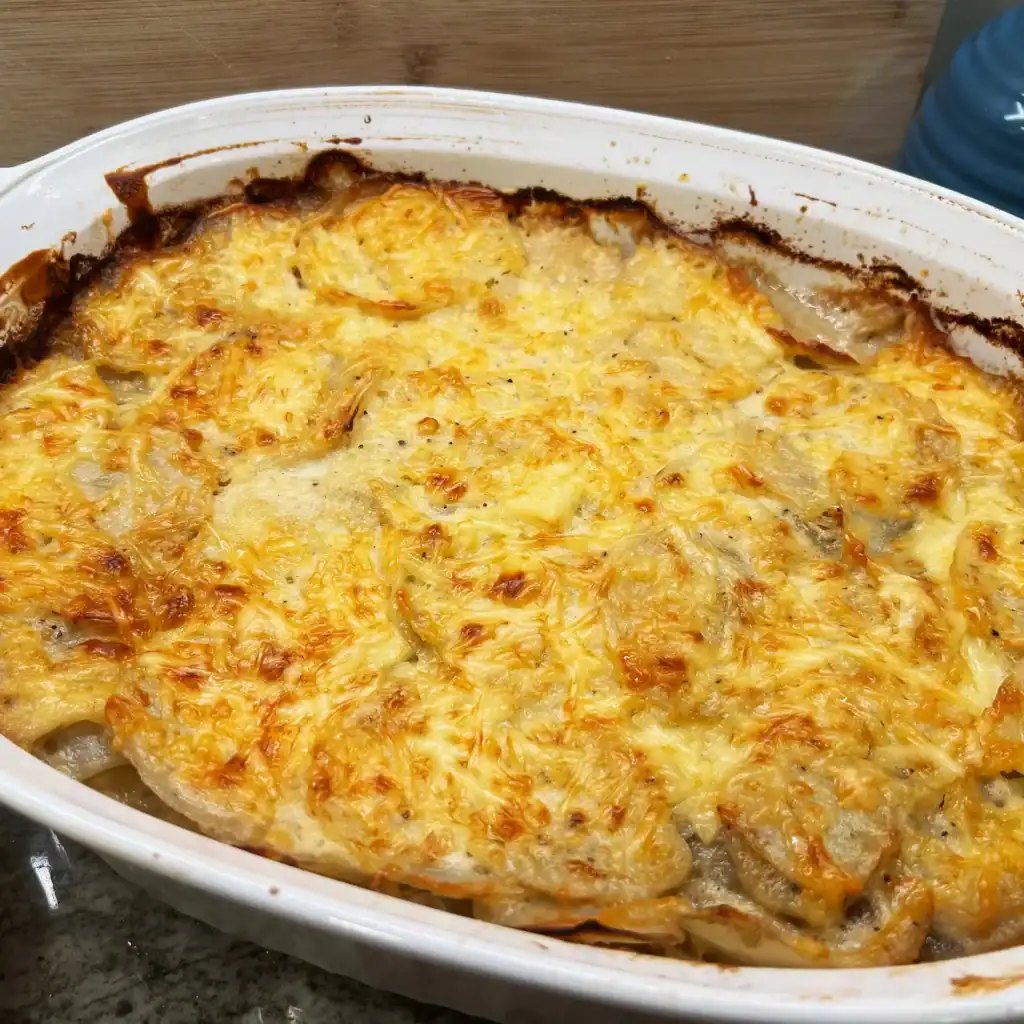
Now, the recipe I’m bringing you today isn’t the exact one from that cookbook — I’ve tweaked it over the years. There’s a little cayenne pepper for just a hint of warmth, a touch of thyme, some Worcestershire sauce for a nice kick and tang, and I use a white sharp cheddar that makes it almost a cross between au gratin and scalloped potatoes. Traditional scalloped potatoes wouldn’t have the cheese, but it’s such a nice addition.
This dish does need to bake for about an hour and a half since the potatoes go in raw, so plan accordingly. Put it in the oven first and then work on the other sides while it bakes.
Prep Time: 30 minutes | Cook Time: 1 hour 30 minutes | Rest Time: 10–15 minutes | Servings: 8–10
Ingredients
For the sauce:
- 4 tablespoons butter (half a stick)
- 1 cup onion, diced small (sweet or yellow)
- ½ cup all-purpose flour
- 2 cups whole milk
- 2 cups heavy cream
- 1 teaspoon salt
- ½ teaspoon black pepper
- Pinch of cayenne pepper (just a little — add more if you want heat)
- Pinch of nutmeg (fresh grated is great, but store-bought works fine)
- ¼ teaspoon dried thyme
- 1 teaspoon Worcestershire sauce
For the casserole:
- About 4 pounds potatoes, peeled and sliced very thin (about ⅛ inch)
- 8 oz white sharp cheddar cheese, shredded
- Additional salt for sprinkling between layers
Instructions
- Preheat your oven to 350°F. Grease a large deep casserole dish.
- Make the sauce first. Melt the butter in a saucepan over medium-low to medium heat. Add the diced onion and let it cook for a couple of minutes until it starts to soften.
- Sprinkle in the flour and stir it into the butter and onions. Let this cook for about 2 minutes to get rid of the raw flour taste. It won’t look pretty at this point, but that’s exactly how it should be.
- Add the milk and stir well, then add the heavy cream. Add all of the seasonings — salt, pepper, cayenne, nutmeg, thyme, and Worcestershire sauce. Continue stirring and cook until the sauce starts to thicken, about 4 to 5 minutes. Don’t let it get too thick — it will continue to thicken as it sits. Remove from heat and set aside.
- While the sauce is resting, peel and slice the potatoes very thin. A mandoline or mixer slicing attachment works great, but a sharp knife works too — just go as thin as you can, about ⅛ inch. If you prep the potatoes early, keep them in water so they don’t turn brown.
- Start layering. Spread a thin layer of sauce on the bottom of your greased casserole dish. Add a thin layer of sliced potatoes. Pour a little more sauce over the potatoes, then sprinkle lightly with cheese and just a touch of salt. Since the potatoes are raw and unseasoned, that little bit of salt between the layers helps a lot.
- Repeat the layers — potatoes, sauce, cheese, light salt — until you’ve used everything up. Finish with sauce and the remaining cheese on top.
- Cover with a lid or foil and bake at 350°F for about 45 minutes. Then remove the cover and bake for another 45 minutes uncovered, until the top is golden brown and bubbly.
- Let the dish rest for at least 10 to 15 minutes before serving. It will be extremely hot and needs time to settle.
FAQ
Why do you bake it covered first, then uncovered? Covering the dish for the first half of baking lets the steam help cook the potatoes through evenly. Taking the lid off for the second half lets the top get golden brown and a little crispy.
Can I use a 9×13 pan for this? You can, but make sure it’s a deep one. This is a large recipe with about 4 pounds of potatoes, so a standard shallow 9×13 may not be tall enough. A deep casserole dish works best.
How thin should the potatoes be sliced? About an eighth of an inch — as thin as you can get them. Thinner slices cook more evenly and give you those nice tender layers. A mandoline or mixer slicing attachment makes this much easier, but a sharp knife works too.
Can I make this ahead of time? You can assemble it the night before and refrigerate it, but you’ll need to add extra baking time since it will be going into the oven cold. Plan for an extra 15 to 20 minutes. You could also bake it earlier in the day and reheat it, covered, at 325°F for about 20 minutes.
What if I don’t have heavy cream? You can use all milk instead of the milk and cream combination. The sauce won’t be quite as rich, but it will still be delicious. Half and half is another good substitute.
Why do you sprinkle extra salt between the layers? The potatoes go into the dish completely raw with no seasoning at all. Even though there’s salt in the sauce and the cheese, a light sprinkle between the layers makes sure the potatoes themselves are well seasoned throughout.
Is this more like au gratin or traditional scalloped potatoes? It’s kind of a cross between the two. Traditional scalloped potatoes don’t have cheese, and au gratin does. This version has the creamy sauce of scalloped potatoes with the cheese of au gratin — and it’s a really nice combination.
Do I have to peel the potatoes? You don’t have to. Leaving the skins on adds some vitamins and a slightly rustic texture. But for a smoother, more classic look and feel, peeling them is the way to go for this dish.
Recipe 5: Easy Mayonnaise Rolls
What Easter dinner is complete without a dinner roll? These mayonnaise rolls are so simple it’s almost hard to believe how good they are. Just three ingredients — self-rising flour, mayonnaise, and buttermilk — and they come together in minutes. No yeast, no rising time, no rolling out or cutting. You just stir it up and spoon them right into a muffin tin. They bake in about 12 minutes at a high heat and come out fluffy on the inside with just a little bit of golden crunch on top.
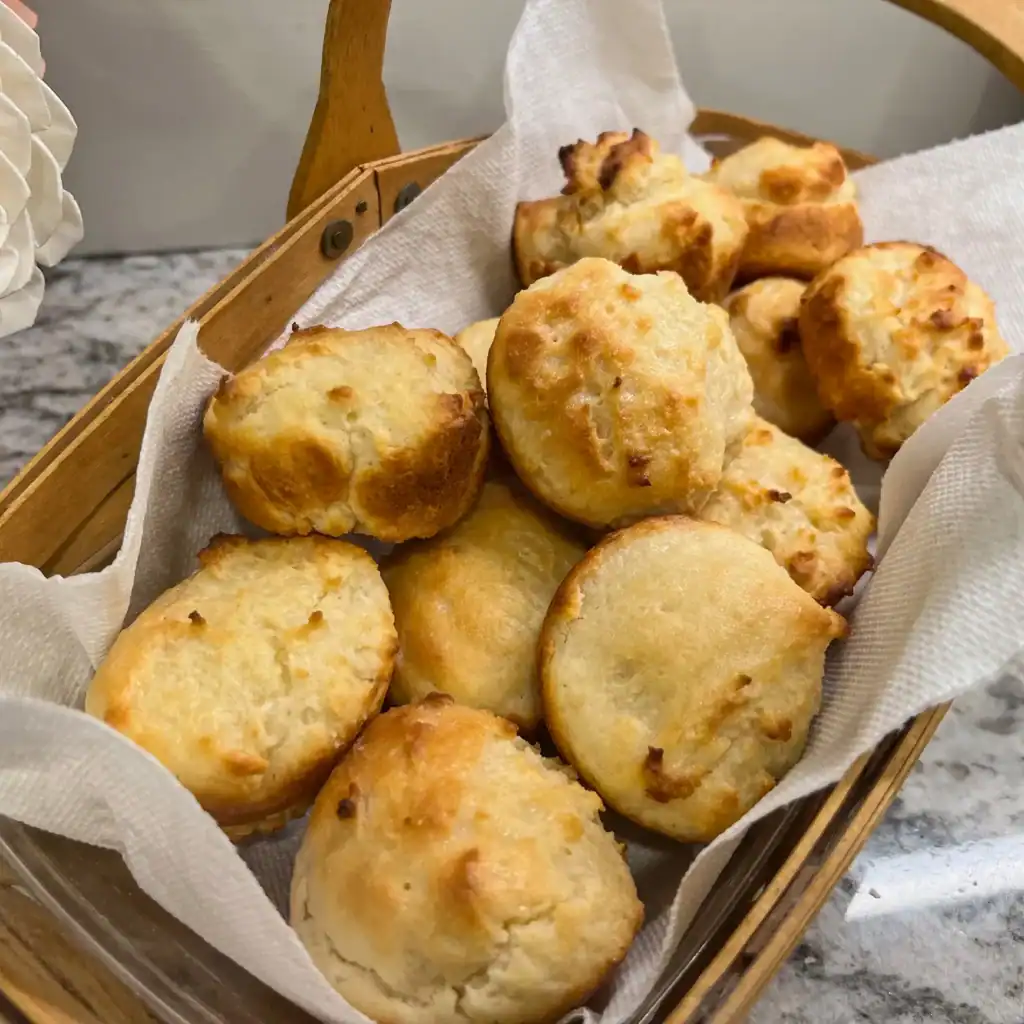
My mom used to make drop biscuits this way on school mornings when we were in a hurry. It was just a quick and easy way to get something homemade on the table without all the fuss. These rolls have that same spirit — they’re not going to look perfect like a yeast roll, but I really love the character they have. And when you brush a little melted butter on top right when they come out of the oven and open one up to see that wonderful, fluffy, steamy inside — that’s when you know you’ve got something good.
The mayonnaise is what gives you the fat content you need for the rolls. It’s full of eggs and oil, so it works perfectly to make them light and fluffy without any extra steps. If you’re not a baker and you don’t want to mess with yeast, this is the recipe for you.
Prep Time: 5 minutes | Cook Time: 12–15 minutes | Makes: About 12 rolls
Ingredients
- 2 cups self-rising flour
- ⅓ cup mayonnaise
- 1 cup buttermilk (or regular milk, or make your own by adding 1 tablespoon vinegar or lemon juice to 1 cup of regular milk and letting it sit for 5 minutes)
- 2 tablespoons butter, melted (for brushing on top)
Instructions
- Preheat your oven to 450°F. Grease a 12-cup muffin tin well.
- Add the self-rising flour to a mixing bowl. Add the mayonnaise and work it into the flour with a spoon until the mixture looks crumbly. That’s exactly what you want at this stage.
- Make a well in the center and pour in the buttermilk. Stir everything together until the dough just comes together. Don’t overwork it — as soon as the flour is incorporated, stop mixing.
- Spoon the dough evenly into the 12 muffin cups. An ice cream scoop works great for this, but two spoons will do the job just fine. These are drop-style rolls, so they don’t have to be perfect.
- Bake at 450°F for 12 to 15 minutes, until the tops are golden brown. Start checking at 10 minutes — every oven runs a little differently at high heat.
- As soon as the rolls come out of the oven, brush the tops with melted butter. Serve warm.
FAQ
Can I use regular milk instead of buttermilk? Yes, the recipe works fine with regular milk. If you’d like buttermilk flavor but don’t keep it on hand, add one tablespoon of vinegar or lemon juice to one cup of regular milk and let it sit for about five minutes. That will give you the curdled buttermilk substitute.
Why is the oven temperature so high? The high heat is what gives these rolls their rise and their golden top. They’re only in the oven for 12 to 15 minutes, so they won’t burn — but do check them around the 10-minute mark, especially if your oven runs hot.
What does the mayonnaise do in this recipe? The mayonnaise provides the fat that you’d normally get from butter or shortening in a traditional biscuit recipe. It’s made of eggs and oil, so it gives you light, fluffy rolls without any extra steps. You won’t taste the mayonnaise in the finished rolls.
Do I have to use a muffin tin? A muffin tin gives them a nice shape and makes portioning easy, but you could also drop them onto a greased baking sheet as drop biscuits. They’ll spread a little more and have a slightly different shape, but they’ll taste just as good.
Can I make these ahead of time? These are best made fresh and served warm. They come together so quickly — about 5 minutes of prep — that I’d recommend making them right before your meal. If you need to, you can bake them a couple of hours ahead and reheat in a 300°F oven for a few minutes wrapped in foil.
Can I add cheese or herbs to these rolls? Absolutely. A little shredded cheddar or some garlic powder mixed into the dough would be a great variation. We have a garlic cheese biscuit recipe on the channel that uses a similar approach if you want to try that.
Why shouldn’t I overwork the dough? Overworking develops the gluten in the flour, which makes the rolls tough instead of tender and fluffy. Stir just until the flour is incorporated and the dough comes together, then stop.
Thanks for joining us at Mary Katherine’s Table! If you make any of these sides for your Easter dinner, we’d love to hear how they turned out. And remember — go out today and find somebody who needs a little bit of kindness, and give them some of yours.
💌 From Your Kitchen to Ours One of my favorite things about this channel is hearing from you. From time to time, we feature viewer-submitted recipes — the tried-and-true dishes you’ve cooked for years and love to share. If you have a favorite family recipe you think belongs at Mary Katherine’s Table, I’d love to see it. Your recipe may be featured in a future From Your Kitchen to Ours video! 👉 Submit your recipe here: marykatherinestable.com/recipe-submission-form