
1970s Peanut Butter Cookies with Rice Krispies
A vintage peanut butter cookie from the 1970s with one surprise ingredient folded in at the very end: Rice Krispies cereal. It makes the cookies a little lighter, keeps them chewy in the middle, and adds a crispy little crunch that sticks around longer than you’d expect.
Simple pantry ingredients, a small batch, one hour of chill time, and 9 to 11 minutes in the oven. My husband says it might be the best peanut butter cookie he’s ever had.
The Peanut Butter Cookie I Somehow Missed
Somebody in this house loves peanut butter cookies. I won’t name names, but he also told me an elephant-and-peanut-butter joke while I was measuring, so you can probably figure it out.
I grew up in the seventies and eighties, and I thought I’d had just about every cookie that was going around back then. But I do not remember this one. When I came across this vintage recipe, I was curious enough about the secret ingredient that I had to give it a try.
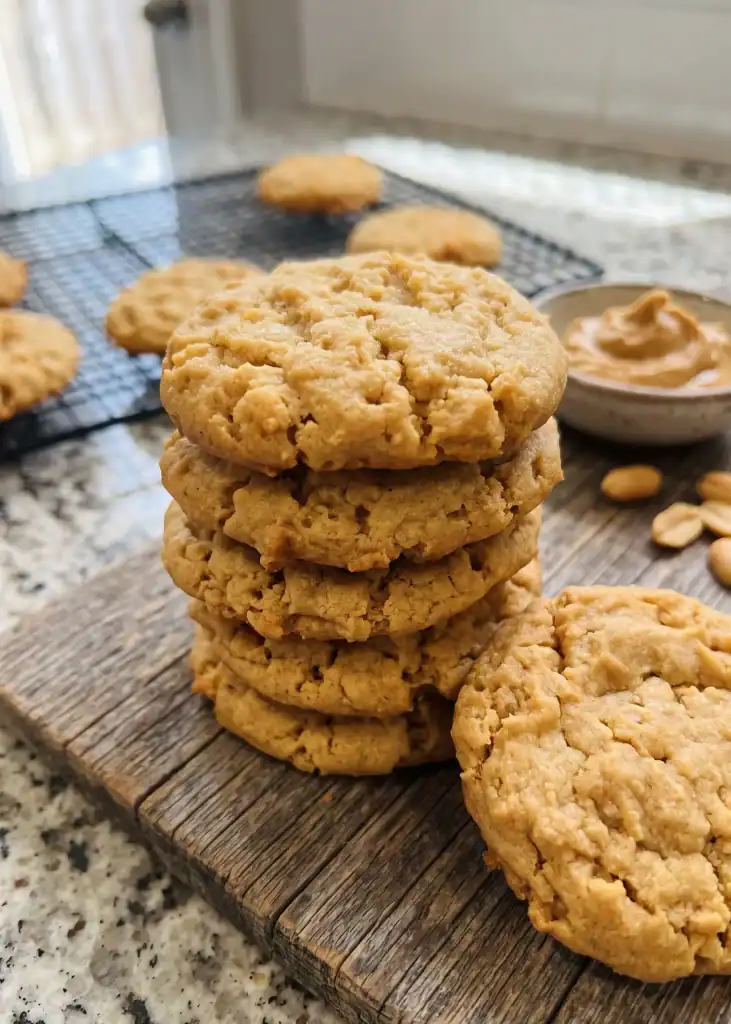
If you’ve seen any of my other cookie videos, you know I usually bake on the low side because I like a gooey cookie. These were different. At the nine-minute mark they were still puffed up and hadn’t started to brown at all, so I gave them the full eleven minutes. I’m so glad I did. They flattened out, got a pretty crackly top, and turned just a touch brown around the edges.
And the taste test? I’m going to be honest — I didn’t expect cereal to make that much of a difference. But that little crispiness stays in there longer than you think it will. They knew what they were doing back in the seventies. This one is a keeper.
1970s Peanut Butter Cookies
Prep time: 15 minutes Chill time: 1 hour Bake time: 9 to 11 minutes Yield: about 18 to 24 cookies, depending on your scoop
Ingredients
- 1/2 cup (1 stick) butter, softened to room temperature
- 1/2 cup granulated white sugar
- 1/2 cup packed brown sugar
- 1 large egg
- 1 1/4 teaspoons vanilla extract
- 1/2 cup peanut butter
- 1 cup all-purpose flour
- 1/4 teaspoon salt
- 1/2 teaspoon baking soda
- 1 1/4 cups Rice Krispies cereal
Instructions
- Measure the peanut butter first. It takes a minute, so I like to get it out of the way before I start. You need 1/2 cup. If you have one of those push-up measuring cups made for sticky ingredients, this is the time to use it.
- Cream the butter and sugars. Add the softened butter, white sugar, and brown sugar to your mixing bowl. You do want to pack that brown sugar when you measure it. Cream them together for about two minutes, until the mixture is light and fluffy.
- Add the wet ingredients. Add the egg, vanilla, and peanut butter. The recipe calls for 1 1/4 teaspoons of vanilla. I used a generous teaspoon and measured it with my heart, and that works just fine. Turn the mixer on and let it do the work, scraping down the bowl a time or two so everything gets well combined.
- Add the dry ingredients slowly. Stir together the flour, salt, and baking soda. Be sure it’s baking soda, not baking powder. Scrape the bowl down one more time, then add the dry ingredients about a third at a time, mixing in between, until the flour is just worked in.
- Fold in the cereal by hand. Add the Rice Krispies at the very end and fold them in with a spatula. You really don’t want to use your mixer for this part — it would break the cereal down more than we want. It only takes a few turns to get them all the way through the dough.
- Scoop, then chill. The dough needs to chill for about an hour. You can chill the whole bowl, but to me it’s easier to scoop the cookies onto the pan first, before the dough hardens up in the fridge. Leave a little room between them because they will spread as they bake. I put eight on my pan. Pop the whole pan in the refrigerator for about an hour.
- Bake. Heat your oven to 350°F and bake for 9 to 11 minutes. At nine minutes mine were still puffed up and hadn’t started to brown, so I gave them the full eleven. You’re looking for cookies that have flattened out, with a crackly top and just a touch of brown around the edges. Your oven might be a little different, so start checking at nine.
- Cool and enjoy. Let them cool on the pan for a few minutes so they can set up, and then it’s time for the moment of truth.
Tips for the Best Peanut Butter Cookies
- Let the butter come all the way to room temperature. It creams so much better with the sugars.
- Don’t skip the chill. It helps the cookies hold together and keeps them from spreading too thin.
- Scoop before you chill. It’s so much easier than trying to scoop cold, firm dough.
- Fold, don’t mix. A few gentle turns by hand keeps the cereal whole, and that’s where the crunch comes from.
- Pick your texture. Pull them closer to nine minutes for a softer cookie, or go the full eleven for a little crispiness around the edge.
- Think gift boxes. This is a small batch of simple cookies, and they would be perfect tucked into a little box for somebody who needs a sweet treat.
FAQ
What is the secret ingredient in 1970s peanut butter cookies? Rice Krispies cereal. It gets folded into the dough at the very end and gives the cookies a lighter texture with a crispy little crunch.
Can you taste the Rice Krispies in the cookies? Not really as a flavor. It’s more about the texture. The cookie still tastes like a classic peanut butter cookie, just a little lighter, with a crispiness that lasts longer than you’d think.
Do I have to chill peanut butter cookie dough? For this recipe, I would. About an hour in the fridge helps the cookies keep their shape in the oven. Scoop the dough onto the pan first and chill it that way to save yourself some trouble.
Can I use crunchy peanut butter instead of creamy? I think you could. You’d get a little extra crunch from the peanuts on top of the cereal. I would stick with a regular shelf-stable peanut butter rather than a natural one that separates, since natural peanut butter can make cookies spread more.
Can I use a store-brand crispy rice cereal? Yes. Any crispy rice cereal will work the same way. Just be sure it’s fresh — stale cereal won’t give you that crunch.
Why didn’t my peanut butter cookies flatten out? They may just need more time. Mine were still puffed up at nine minutes and needed the full eleven to flatten and get that crackly top. Also double check that you used baking soda and not baking powder.
How many cookies does this recipe make? It’s a small batch — somewhere around 18 to 24 cookies depending on the size of your scoop. If you’re baking for a crowd, the recipe doubles easily.
How do I store these cookies? Keep them in an airtight container at room temperature for four to five days. The cereal will soften a bit as the days go on, so they’re at their crispiest the first day or two.
Can I freeze the cookie dough? Yes. Scoop the dough onto a pan, freeze until firm, and then move the dough balls to a freezer bag. Bake them straight from the freezer and add a minute or two to the bake time.
Do I need to press these with a fork like traditional peanut butter cookies? No. I didn’t press these at all. They flatten out on their own as they bake and get a pretty crackly top without the crisscross.
Give These a Try
It’s such a simple recipe, and you’ve probably got everything on hand already — you might just need to pick up a box of cereal. I had never made these before, but I will be making them again, I’m sure. I hope you’ll give them a try, and I think your family will love them too.
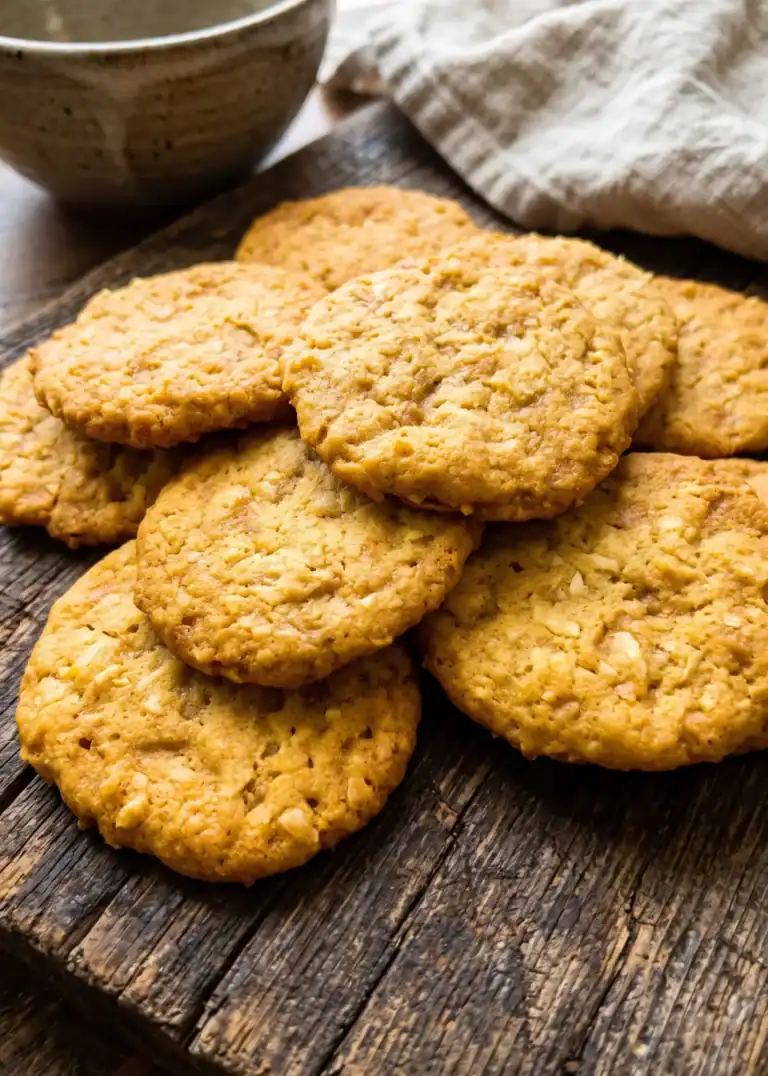
If you’re looking for another cookie with great texture, take a look at our Ranger Cookies. They were a hit in this house too.
Thank you so much for joining me at Mary Katherine’s Table. And remember to go out today and find somebody who needs a little bit of kindness and give them some of yours.
1970s Peanut Butter Cookies
Equipment
- Stand mixer or hand mixer
- Cookie scoop
- Baking sheet
Ingredients
- 1/2 cup butter softened to room temperature (1 stick)
- 1/2 cup granulated white sugar
- 1/2 cup brown sugar packed
- 1 large egg
- 1 1/4 teaspoons vanilla extract
- 1/2 cup peanut butter
- 1 cup all-purpose flour
- 1/4 teaspoon salt
- 1/2 teaspoon baking soda not baking powder
- 1 1/4 cups Rice Krispies cereal or any crispy rice cereal
Instructions
- Measure out the peanut butter first so it’s ready to go.
- In a mixing bowl, cream the softened butter, white sugar, and packed brown sugar together for about 2 minutes, until light and fluffy.
- Add the egg, vanilla, and peanut butter. Mix until well combined, scraping down the bowl a time or two.
- Stir together the flour, salt, and baking soda. Add to the dough about a third at a time, mixing between additions, until just combined.
- Fold the Rice Krispies cereal in by hand with a spatula. Don’t use the mixer for this step — it will crush the cereal.
- Scoop the dough onto a baking sheet, leaving room for the cookies to spread (about 8 per pan). Chill the scooped dough in the refrigerator for about 1 hour.
- Bake at 350°F for 9 to 11 minutes, until the cookies have flattened out, the tops look crackly, and the edges are just starting to brown.
- Let cool on the pan for a few minutes before serving.
Video
Notes
- Scoop the dough before chilling — it’s much easier than scooping cold, firm dough.
- For a softer cookie, pull them closer to 9 minutes. For a little crispiness around the edge, give them the full 11.
- Fold the cereal in gently by hand so it stays whole. That’s where the crunch comes from.
- Be sure to use baking soda, not baking powder.
- Store in an airtight container at room temperature for 4 to 5 days. The cookies are at their crispiest the first day or two.
- To freeze, scoop the dough, freeze until firm, and store in a freezer bag. Bake from frozen, adding a minute or two.



Hello Mary how can I substitute for receive the receipt email or newsletter.
Hi Gabriella!
You can go here and submit your info and you’ll be added to the email list!
https://marykatherinestable.com/join-my-newsletter/
a peanut butter cookie without the criss cross patterns??? ohhh the blasphemy lol. im kidding. im making them today:)
Haha! I know! With the texture from the rice krispies, I just didn’t think they needed that criss cross. Hope you enjoy them!