Old Fashioned Buttermilk Pie (The Pie They Called “Desperation Pie”)
This Southern buttermilk pie is made from six pantry staples — butter, eggs, sugar, flour, buttermilk and vanilla — poured into a pie shell and baked at 350°F for 45 minutes. That’s it. No fruit to peel, no candy thermometer, no fussy technique.
Here’s the part I love most: this recipe makes two pies. One to keep and one to share, or one for home and one for the potluck. And it uses my double pie crust recipe exactly as written, so nothing goes to waste.
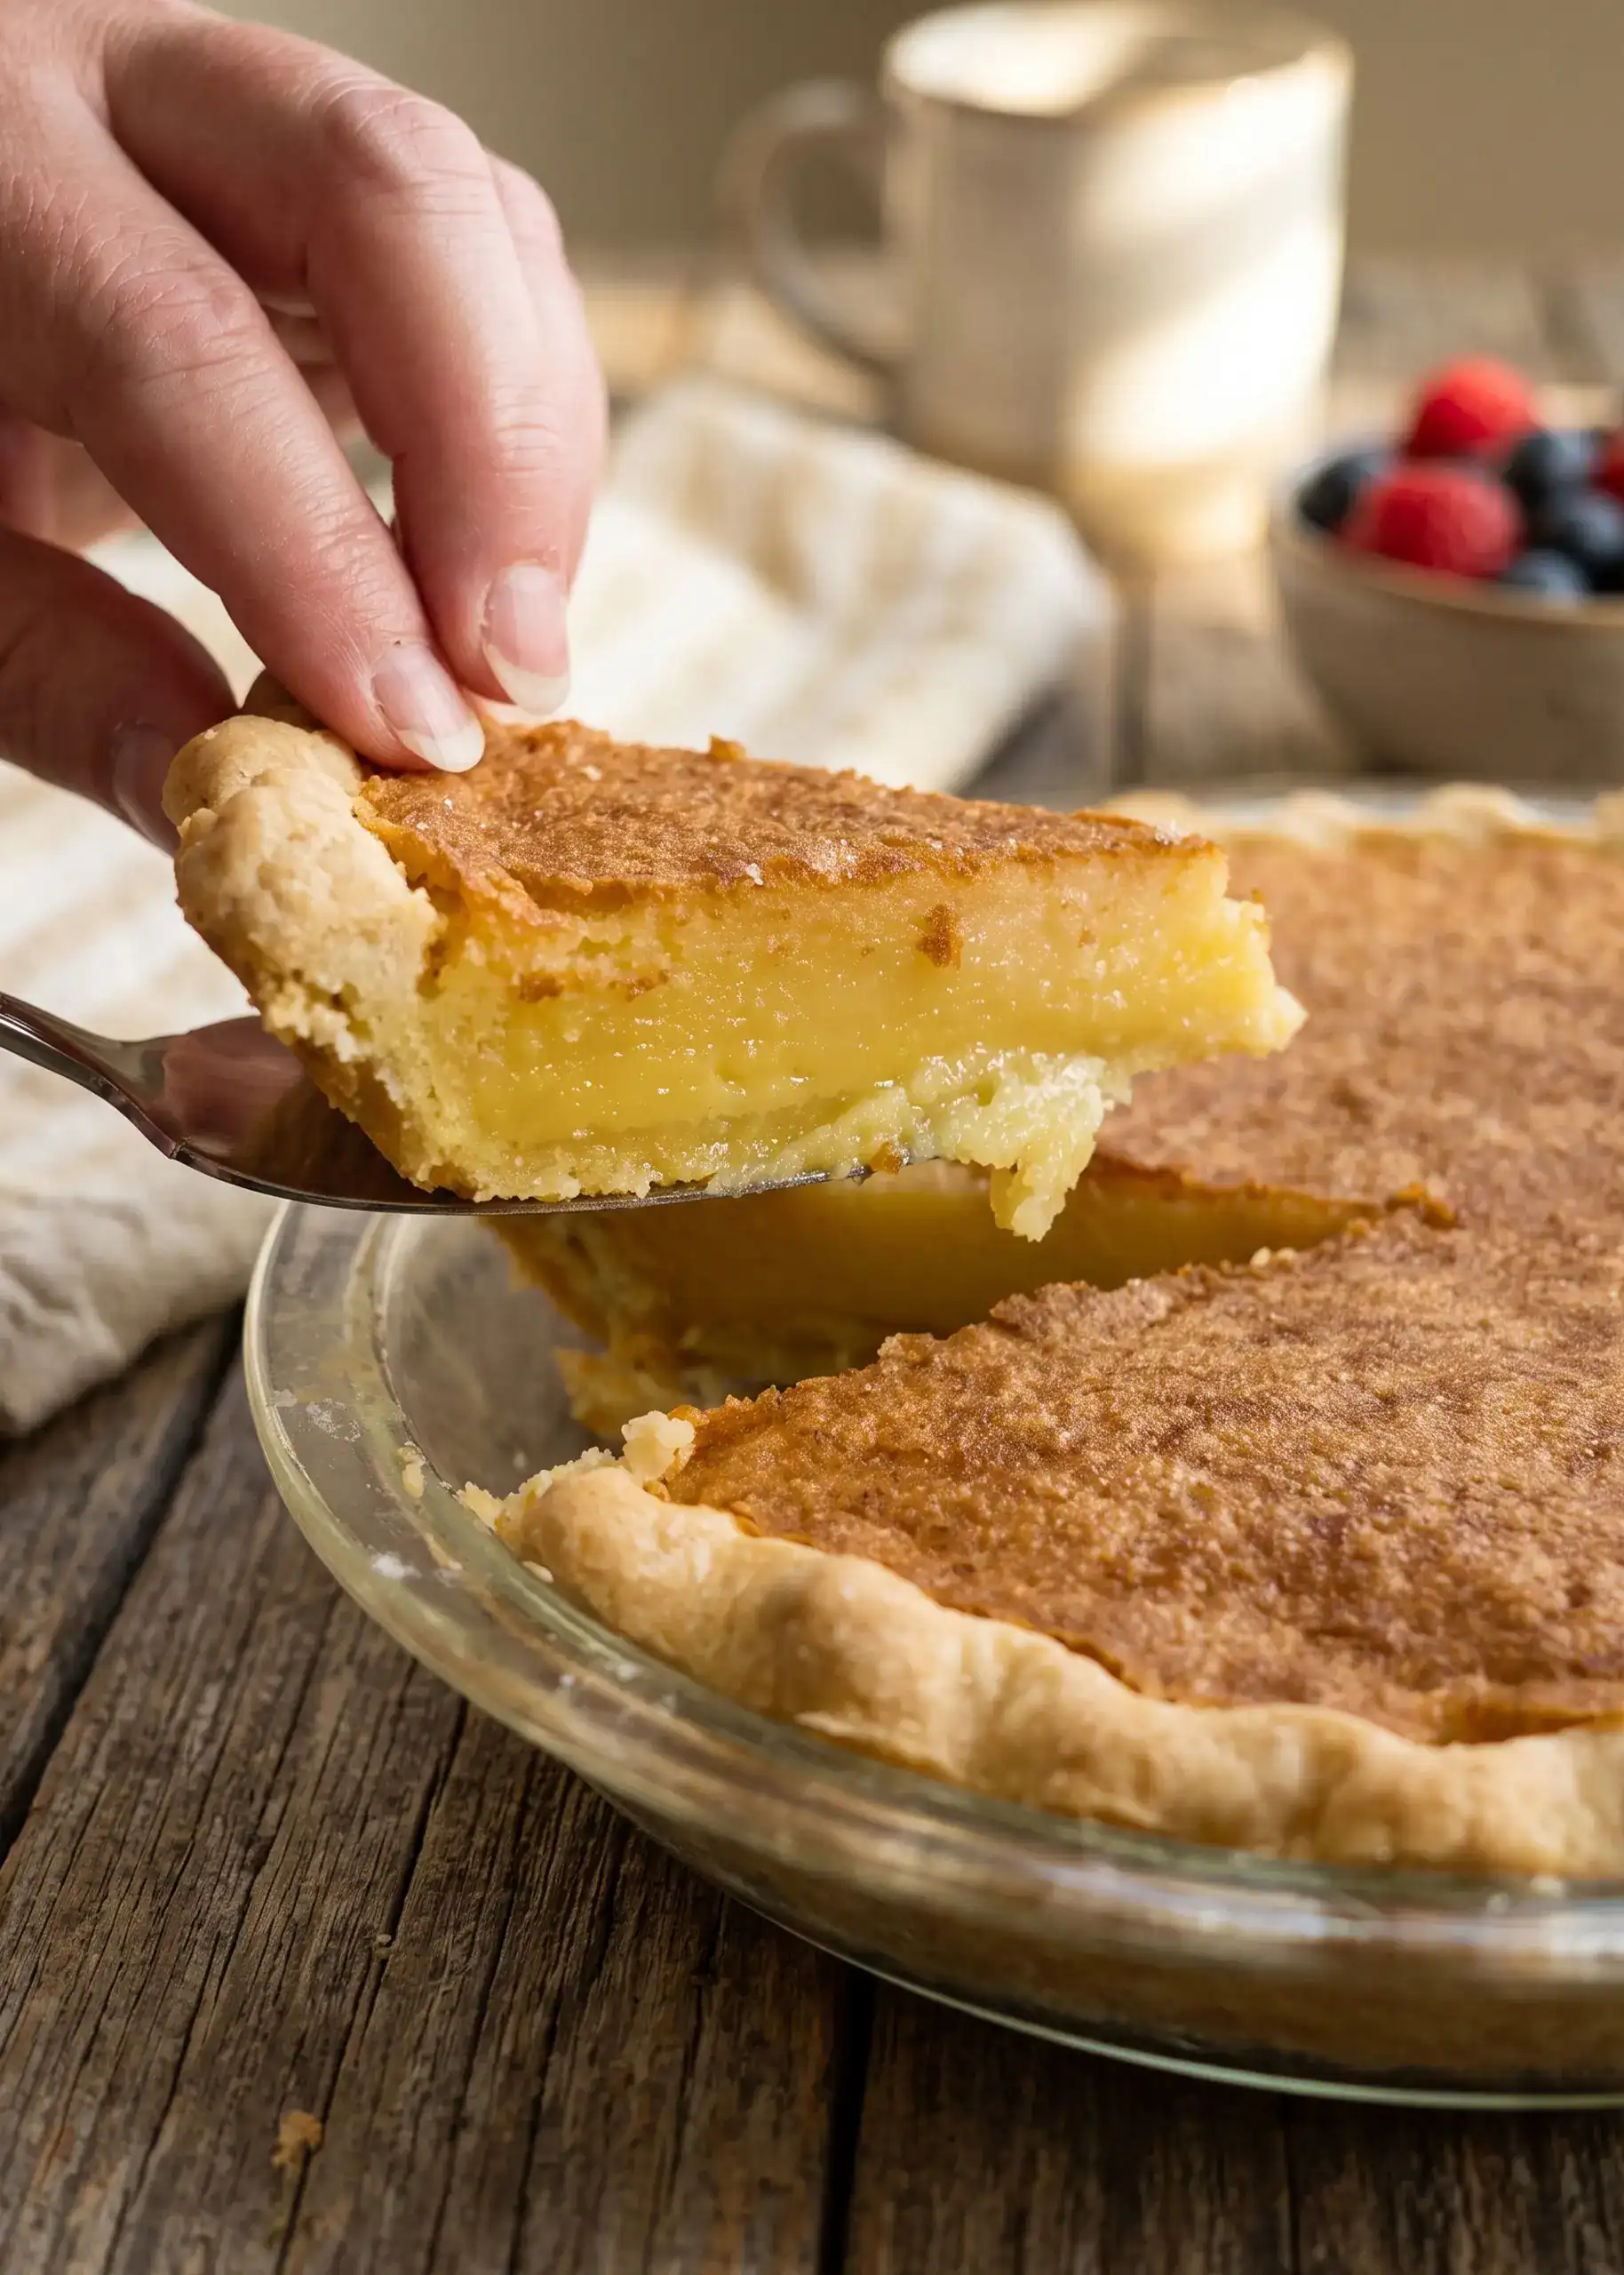
They used to call this a desperation pie, because it’s what you made when money was tight and there was no fresh fruit to be had. But there is nothing desperate about the way it tastes. It bakes up golden on top with a soft, sweet, almost custardy center, and it is unbelievably good with a cup of coffee.
- Six simple ingredients you probably already have
- Makes two pies from one batch of filling
- No mixer required — a whisk and a fork will do it
- Over 200 years of history in one very humble pie
Why They Call It Desperation Pie
I have to tell you the story behind this one, because it’s the reason I love making it.
This pie has been around a long, long time. The roots of it go all the way back to England, and the settlers brought the recipe with them when they came to America. So this recipe is about as old as our nation is. It landed first in Texas, from what I understand, and then it spread out across the whole South. It also became a treasured part of the African American cooking tradition, and those cooks were so good about passing recipes down from one generation to the next. That’s a big part of why we still get to enjoy it today.
But why desperation pie? Think about what it was like back then. Maybe you didn’t have a lot of fresh fruit available. Maybe you couldn’t afford the fancy ingredients. But you could almost always put your hands on eggs, buttermilk, a little flour, some sugar and butter. Even before refrigeration, you could churn your own butter, you could make your own buttermilk, and you could go out to the henhouse and gather your own eggs. Everything you needed to make this pie was already right there.
And now for my own little moment of desperation.
When we sat down to film this, we had a whole batch of farm fresh eggs — and every last one of them was bad. I mean we could not use a single one. My husband had to make a quick run to the store to get us some good eggs before we could keep going. He looked at me and said, “Well, it would have been a desperation pie,” and honestly, he was not wrong.
But here’s the thing I want you to take away from that. This is exactly why I crack each egg into a bowl by itself. I check it, I beat it up a little, and then I add it to the others. If I had cracked those eggs straight into my melted butter, I would have ruined the whole batch and had to start completely over. Cracking them one at a time saved us that day, and it will save you someday too.
We had one more little bit of desperation waiting on us at the end. This pie has to cool completely before you can cut it — we’re talking two to three hours. So there we sat, two pies on the counter, golden and beautiful, and we couldn’t touch them. My husband said that’s another reason they call it desperation pie, and I think he might be onto something.
Old Fashioned Buttermilk Pie Recipe
Prep Time: 20 minutes Bake Time: 45 minutes Cooling Time: 2–3 hours Total Time: About 4 hours Yield: 2 pies (about 16 slices)
Ingredients
- 2 unbaked 9-inch pie crusts (homemade or store-bought)
- 1 cup butter (2 sticks), melted
- 6 eggs, beaten
- 3 1/2 cups sugar
- 1/2 cup all-purpose flour (plain)
- 1 teaspoon salt
- 1 cup buttermilk
- 1 teaspoon vanilla extract
Instructions
- Get your crusts ready and chill them. I use my homemade double crust recipe, which is exactly enough for two pie shells. Roll them out, fit them into your pie pans, and then put them in the refrigerator or even the freezer while you make the filling. You want them good and cold when that filling goes in. This is one of those little steps that makes a real difference, so don’t skip it.
- Mix your dry ingredients. In a bowl, whisk together 3 1/2 cups of sugar, 1/2 cup of flour, and 1 teaspoon of salt. Just give it a quick whisk until the flour breaks down into the sugar. And listen — this isn’t a cake, so you do not have to be extremely careful with the dip-level-pour method on your flour today. Set this aside.
- Melt your butter. One cup, which is two whole sticks. I melt mine right in a pitcher, because that’s going to make it so much easier to pour the filling into the shells later. Let it cool down a little before the next step.
- Add the eggs one at a time. Crack each egg into a separate bowl first and take a good look at it. Once you know it’s good, beat it up a little and add it in. Do that with all six. Trust me on this one — it takes an extra minute and it can save your whole pie. Then give the whole thing a quick mix with a fork.
- Stir in the dry ingredients. Add your sugar and flour mixture into the melted butter and eggs and mix it together.
- Add the buttermilk and vanilla. Switch over to a whisk here. Give your buttermilk a good shake, then add 1 cup along with 1 teaspoon of vanilla. I always give the vanilla a little extra splash — that is not going to hurt one bit. Whisk until it’s smooth and well combined.
- Fill your chilled crusts. Pull those cold shells out and pour the filling in, trying to get equal amounts into each one.
- Bake at 350°F for 45 minutes. Check on them around the 30 minute mark. If the tops are getting too brown, lay a piece of foil loosely over the top to keep them from going any further. Your oven might be a little different from mine, so keep an eye on yours.
- Let them cool — all the way. When they come out they’ll be golden brown on top and still a little jiggly in the middle. That is completely normal for this pie. It sets up as it cools, and it needs a good 2 to 3 hours before you cut into it. I know that’s the hard part. Do it anyway.
- Serve it up. You can absolutely put a little homemade whipped cream on top and it will look so pretty. But I’ll be honest with you — this pie can stand on its own. And if you’re someone who loves a slice of pie with a cup of coffee, this is the one.
Frequently Asked Questions
What does buttermilk pie taste like? It’s sweet and rich with a soft, custard-like center and a thin golden crust that forms on top as it bakes. The buttermilk gives it just enough tang to keep all that sugar from being too much. If you’ve had chess pie, it’s in that same family.
What is a desperation pie? Desperation pies are the old pies people made when fresh fruit and fancy ingredients weren’t available or affordable. They rely on pantry staples like sugar, eggs, flour, butter and buttermilk. Buttermilk pie, chess pie and vinegar pie all fall into this category.
Why does this recipe make two pies? Because the amounts line up perfectly with a standard double pie crust recipe, and because pies like this disappear fast. Take one to a potluck and keep one for yourself, or share one with somebody who could use a little kindness.
Can I halve the recipe to make just one pie? You can. Cut everything in half — 1/2 cup butter, 3 eggs, 1 3/4 cups sugar, 1/4 cup flour, 1/2 teaspoon salt, 1/2 cup buttermilk, and 1/2 teaspoon vanilla. Bake time stays about the same, but start checking around 35 minutes.
Can I use store-bought pie crust? Absolutely, and there’s no shame in it at all. It’ll still be a good pie. I will tell you honestly though, once you’ve made a homemade crust and tasted the difference, it’s hard to go back.
Do I have to use real buttermilk? Real buttermilk is best here, since it’s right there in the name and it’s doing the work of balancing all that sugar. If you’re in a pinch, you can add 1 tablespoon of white vinegar or lemon juice to a measuring cup and fill it to 1 cup with milk, then let it sit about 5 minutes.
Why is my buttermilk pie still runny in the middle? Most of the time it just needs more cooling time. This pie comes out of the oven jiggly and finishes setting on the counter, and that takes 2 to 3 hours. If it’s still loose after it’s completely cool, it likely needed a few more minutes in the oven.
How do I keep the crust from getting too brown? Check it around 30 minutes. If the edges or top are browning faster than you’d like, lay a piece of foil loosely over the top for the rest of the bake.
How do I store buttermilk pie? Cover it and keep it in the refrigerator for up to 4 days. Some folks like it cold straight from the fridge, and some like it closer to room temperature. Both are good.
Can I freeze it? Yes. Let it cool completely, wrap it well, and freeze up to 2 months. Thaw it overnight in the refrigerator.
Old Fashioned Buttermilk Pie
Equipment
- 2 9-inch pie pans
- 1 Large mixing bowl
- 1 Whisk
- 1 Pitcher or large measuring cup (for melting butter)
- 1 Small bowl (for cracking eggs one at a time)
Ingredients
Crust
- 2 unbaked 9-inch pie crusts (homemade or store-bought)
Filling
- 1 cup butter (2 sticks) melted and slightly cooled
- 6 eggs (beaten)
- 3 1/2 cups sugar
- 1/2 cup all-purpose flour
- 1 teaspoon salt
- 1 cup buttermilk
- 1 teaspoon vanilla extract
Instructions
- Fit the pie crusts into two 9-inch pie pans and place them in the refrigerator or freezer to chill while you make the filling. You want them good and cold when the filling goes in.
- Preheat the oven to 350°F.
- In a bowl, whisk together the sugar, flour and salt until the flour breaks down into the sugar. Set aside.
- Melt the butter in a pitcher or large measuring cup. Let it cool slightly. Using a pitcher makes it much easier to pour the filling into the shells later.
- Crack each egg into a separate small bowl and check that it is good before adding it. Beat each one lightly, then add it to the melted butter, one at a time. Mix with a fork.
- Add the sugar and flour mixture to the butter and eggs and stir to combine.
- Switch to a whisk. Add the buttermilk and vanilla and whisk until smooth and well combined.
- Pull the chilled crusts from the refrigerator and pour the filling in, dividing it evenly between the two pies.
- Bake at 350°F for 45 minutes. Check at 30 minutes; if the tops are browning too quickly, lay a piece of foil loosely over them for the remaining bake time.
- Remove from the oven. The centers will still look a little jiggly — that is normal. Cool completely on the counter for 2 to 3 hours before slicing. The pie sets up as it cools.
- Serve plain or with a spoonful of homemade whipped cream. It is especially good with a cup of coffee.
Video
Notes
- Crack eggs individually. Crack each egg into its own bowl and check it before adding it to the butter. One bad egg added straight to the bowl means starting the whole batch over.
- Chill the crusts. Cold shells going into a hot oven help the crust hold its shape and bake up better underneath the filling.
- Don’t rush the cooling. This pie comes out of the oven jiggly and finishes setting on the counter. Cutting early gives you a runny slice.
- To make one pie, halve everything: 1/2 cup butter, 3 eggs, 1 3/4 cups sugar, 1/4 cup flour, 1/2 teaspoon salt, 1/2 cup buttermilk, 1/2 teaspoon vanilla. Start checking at 35 minutes.
- Buttermilk substitute: add 1 tablespoon white vinegar or lemon juice to a measuring cup, fill to 1 cup with milk, and let sit 5 minutes.
- Storage: cover and refrigerate up to 4 days, or wrap well and freeze up to 2 months. Thaw overnight in the refrigerator.